Sunday, September 5, 2010

Roasted Chicken... Without the Roaster

Crock Pot "Roasted" Chicken

I roasted a whole chicken once. It was a lot of work, a lot of sweat, and a lot of waiting around wondering how it would turn out. In the end? Meh. It was just OK. I felt like all my efforts resulted in a bland, slightly slimy dinner.
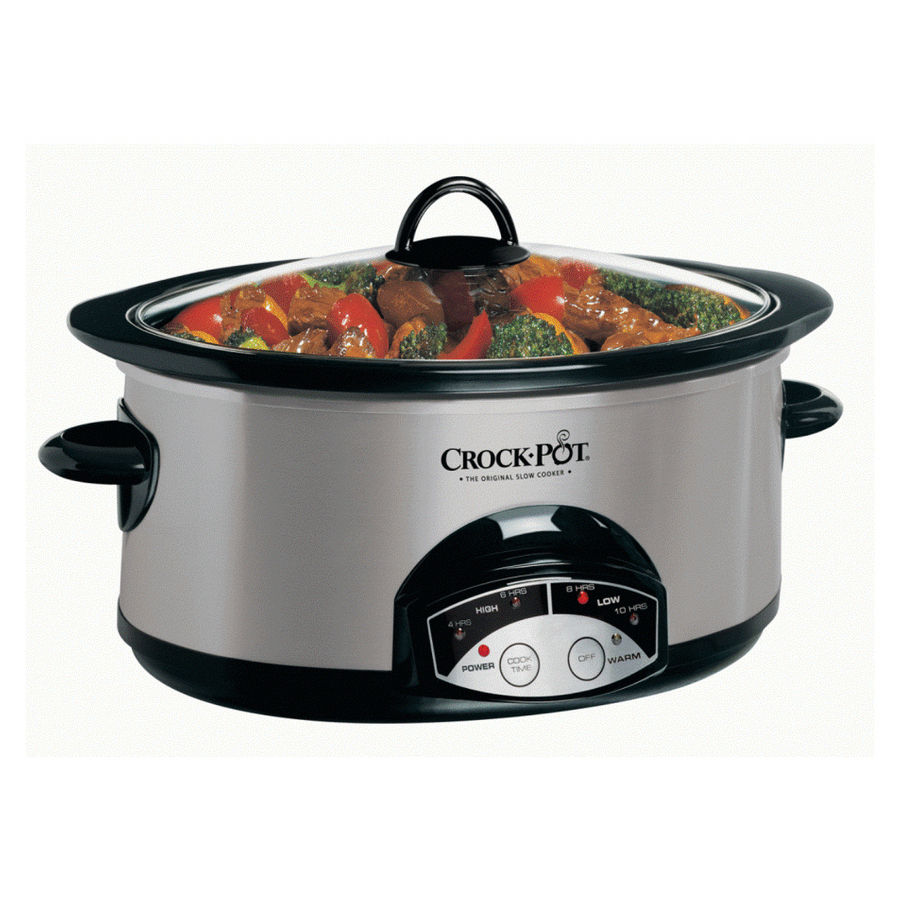
This time, I decided to turn to my trusty kitchen friend, the Crock Pot. She's rarely let me down and when I found a simple recipe for roasted chicken, slow cooker style, I knew I had to give it a go.

This chicken is full of flavor, a fix it and forget it contender, and still just as messy!
We served this chicken with roasted brussel sprouts and Kalamata pasta salad the first night and used the remaining meat in other dishes. I hope you can find an opportunity to put it to the test and enjoy hassle-free meals all week long.
Cheers!
MM

Slow Roasted Crock Pot Chicken
The Ingredients:
-1 whole chicken (I used about a 4 pounder)
-3 Tbsp. Butter
-1 tsp. Paprika
-1/2 tsp. Cayenne Pepper
-1/2 tsp. Oregano
-3-4 Garlic cloves, minced
-1 whole red bell pepper, quartered
-1 small yellow onion, quartered

The Process:
-Wash chicken, cleaning out cavity, and pat dry.
-Combine spices and room temperature butter in a small dish. Add half the fresh garlic and mix ingredients until combined.
-Take small amounts of butter mixture in your hand and rub under chicken skin on breast and thigh meat. Rub remaining mixture over chicken skin.
-Stuff chicken cavity with bell peppers, 1/2 the onion and remaining garlic.
-Place remaining onion in bottom of slow cooker and place chicken breast side down on top on onion.
-Cover Crock Pot and set on low. Cook for 6-8 hours until chicken is done (About 175 degrees, no longer pink, juices run clear).
-Pull meat from bones and enjoy!

Frozen Pizza No More


I will admit to being a bit of a pizzaholic. I honestly could eat pizza once a week, if not more often. However, when it comes to making pizza at home, I have been a big baby. I don't know why but pizza dough totally intimidated me. Until now!

A few weeks ago, I finally broke down and purchased my new favorite kitchen accessory: The KitchenAid Stand Mixer. Isn't she beautiful?

I guess now would be the time to confess that I had previously vowed that I did not need such a ginormous gadget in MY kitchen... until I literally broke my hand/stand mixer last Christmas whilst making cookies. But that's a whole other post!

Back to the pizza....

The stand mixer makes this dough recipe fairly easy to follow, especially if you use all bread flour instead of mixing in the whole wheat. I am still working on getting the hang of forming a round, truly round, pizza pie. Guess that just means I need to practice more often!

Cheers!
MM

Traditional Pizza Dough- Adapted from The Way the Cookie Crumbles

The Ingredients:
-2 tablespoons olive oil
-½ teaspoon dried oregano (I also added dried Basil and a pinch of Rosemary)
-4 cups bread flour (I used 2 1/2 c. All-Purpose flour and 1 1/2 c. Whole Wheat flour)
-1¾ teaspoons salt
-1 teaspoon sugar
-2 teaspoons instant yeast
-¼ cups white wine (I used 1/2 c. wine and 1/4 less c. water)
-1½ cups water

The Process:
-In the bowl of a stand mixer fitted with the dough hook, mix the flour, salt, sugar, and yeast.

-Heat the oil and oregano in a small saucepan over medium low heat until warm and fragrant. Mix in the water and white wine and simmer until mixture begins to bubble slightly.

***Note: Make sure you read the instructions for your mixer speed requirements for pizza/bread dough before proceeding***

-With the mixer on low speed, pour in the liquid mixture. Continue mixing on medium-low speed until the dough comes together, and then knead on medium-low speed until the dough is smooth and elastic (about 8-10 minutes).
Add more flour or water as necessary to form a dough that is sticky but does not cling to the sides of the bowl. When the mixer is running on medium-low speed, the dough should not stick to the bottom of the bowl. (I had to add about 3 Tbsp. more flour, which may have been from the increased amount of wine I used).

-Spray a large bowl with non-stick spray. Coat your hands with oil, then quickly form the dough into a ball. Place the ball of dough in the bowl and cover with plastic wrap.
Either set the dough aside to rise at room temperature, which will take 1½ to 2 hours, or refrigerate it until the next day. If it’s chilled overnight, it will take about 5 hours at room temperature to warm and finish rising.

-Preheat the oven to 500 degrees Fahrenheit.

-Divide the dough and shape each portion into a ball. The original recipe states it makes enough dough for three 12-inch pizzas. Apparently the Mr. and I are pigs because we only divided it in half. Let the dough relax while oven preheats.

-Work with one ball of dough at a time on a lightly floured surface. Flatten the dough, then pick it up and gently stretch it out, trying to keep it as circular as possible. Curl your fingers and let the dough hang on your knuckles, moving and rotating the dough so it stretches evenly. If it tears, just piece it together. If the dough stretches too much, put it down and gently tug on the thick spots.

-Dust a pizza peel lightly with cornmeal and transfer the round of dough to the peel (We don't have a peel or pizza stone, so I used a regular cookie sheet). Stab it several times with a fork.

-Add the sauce and toppings of your choice, then bake for 8-10 minutes, until the cheese is bubbling and the crust is spotty brown.

Monday, June 14, 2010

Chicken Tamales Made Easy

I try to cook health conscious foods, I really do! But every once in a while you've just got to let it all go and indulge! For me, that jump off the tracks typically involves cheese. Lots AND lots of cheese. Yum!
This recipe makes good use of a smaller amount of cheese and it is from Cooking Light, so it can't be that bad, right? Well if it is, I don't want to be right!
The delicious taste of chicken tamales without the hassle of making them from scratch when it is a weeknight and you just want to hurry up and watch your favorite DVRed shows.
Cheers!
MM

Chicken Tamale Casserole (adapted from Cooking Light):
Ingredients:
1 cup (4 ounces) 4-cheese Mexican blend cheese, divided
1/3 cup fat-free milk
1/4 cup egg substitute
1 teaspoon ground cumin
1/8 teaspoon ground red pepper
1 (14 3/4-ounce) can cream-style corn
1 (8.5-ounce) box corn muffin mix (such as Martha White)
1 (4-ounce) can chopped green chiles, drained
Cooking spray
1 (10-ounce) can red enchilada sauce (such as Old El Paso)
2 cups shredded cooked chicken breast
1/2 cup fat-free sour cream

Process:
-Preheat oven to 400°.
-Combine 1/4 cup cheese and next 7 ingredients (through chiles) in a large bowl, stirring just until moist. Pour mixture into a 13 x 9–inch baking dish coated with cooking spray.
-Bake at 400° for 15 minutes or until set. Pierce entire surface liberally with a fork; pour enchilada sauce over top. Top with chicken; sprinkle with remaining 3/4 cup cheese. Bake at 400° for 15 minutes or until cheese melts. Remove from oven; let stand 5 minutes. Cut into 8 pieces; serve with sour cream.

Pasta Salad... Without the Guilt!

Rotini Pasta Salad with Kalamata Vinaigrette


Pasta salad just embodies Summer to me. But as you will find at most festive BBQs in the steamy months, pasta salad is usually loaded down with heavy dressings and fatty ingredients. Not to mention all those carbs in the star of the dish.
I found this alternative in my trusty Cooking Light subscription and added my own twist to make it a Mr. and Mrs. favorite summer-time staple.
Cheers!
MM

Rotini Pasta Salad- Adapted from Cooking Light
The Ingredients:
-1 box Whole Wheat rotini pasta (I use Barilla)
-1 red bell pepper, sliced and chopped
-1 yellow bell pepper, sliced and chopped
-1 small red onion, thinly sliced (I typically only use about a quarter of the onion.)
-1 pint grape tomatoes, washed and sliced in half
-1 cup fresh basil leaves, thinly sliced
-3oz. smoked deli turkey, cut in chunks (I always ask my deli counter to chunk the turkey for me. Just tell them you need it for a salad dish).
-1/4 c. Kalamata olives, sliced (you can use whatever olives you have or just omit these)

Dressing:
-3 cloves garlic, peeled and finely minced
-1 large shallot, peeled and minced (you can use red onion if you don't have shallots)
-4 Tbsp. White Balsamic vinegar (regular Balsamic works too)
-2 Tbsp. water
-1 tsp. Dijon mustard
-salt and pepper to taste.

The Process:
-Preheat broiler.
-Cut red bell pepper in half lengthwise; discard seeds and membranes. Place red and yellow pepper halves, skin sides up, on a foil-lined baking sheet; flatten with hand. Broil 15 minutes or until blackened. Place in a zip-top plastic bag; seal. Let stand 10 minutes. Peel and dice; place in a large bowl.
-Cook pasta according to package directions. Drain. Add pasta mixture, tomatoes, onion and turkey to peppers; toss well.
-Heat a small saucepan over medium-low heat. Coat pan with cooking spray. Add garlic and shallot to pan. Cook 15 minutes or until soft, stirring occasionally.
-Place the garlic mixture, vinegar, and remaining ingredients in a blender; process until smooth. -Pour dressing over pasta mixture; toss well.
-Sprinkle salad with fresh sliced basil.

Heavenly Halibut

My Dad and step mom came to visit and we visited our favorite local seafood provider to pick up some shrimp cocktail. While there, we spotted these beautiful Halibut fillets and I knew that had to come home with us. I had saved this recipe about a year ago and now was the time to whip it out and put it to use.
These fillets turned out very light, perfectly flaky and full of flavor. An easy weeknight meal that will leave you room for a glass of wine, dessert... or both : )

Cheers!
MM

Halibut with Balsamic Glaze (adapted from Food Network)
Ingredients:
1/2 c. balsamic vinegar
2 to 3 Tbsp. honey (I used 3 because I like the sweet contrast)
3 Tbsp. EVOO (extra virgin olive oil)
2 cloves fresh garlic, minced
4 (6 ounce) Halibut fillets

Process:
-Whisk vinegar, honey, oil and garlic in a glass bowl. Place halibut in an 8-inch baking dish and pour marinade over, coating fish completely. Cover and refrigerate up to 4 hours.
-Preheat broiler and line a baking sheet with foil. Spray with cooking spray.
-Remove fish from marinade and place on baking sheet.
-Broil fillets about 12 minutes, until they are lightly browned on top and cooked through.
-Pour reserve marinade into a small saucepan. Bring sauce to a boil and simmer. Continue to whisk mixture until it becomes thick and syrupy.


OMG! Panko Pork Chops

Dear readers- RUN! Run to your kitchen and make.these.chops!!!! Does that give you an idea of how fabulous I think this recipe is? Wow. The Mr. and I are trying to buy more bulk meats at our local Sam's Club to cut down on our weekly bill at the grocery store and to add to our convenience when cooking. We had these beautiful, thick, boneless pork chops just begging to step up to the plate (our plates, that is). So I went to my recipe folder and started digging for inspiration. I had saved this recipe from an old copy of Cooking Light (my own version of a Bible) and decided to try it out since we had most of the ingredients on hand. Let's just say I think some divine intervention came into play ; )
We served them with a spring mix, steamed green beans and sauteed, tri-colored peppers.
Cheers!
MM

Panko-Crusted pork Chops with Creamy Herb dressing (adapted from Cooking Light)
Ingredients:
Pork-
6 tsp. all purpose flour
2 tsp. salt
2 tsp. onion powder
2 tsp. cumin
1 tsp. chili powder
1/2 tsp. ground red pepper (i used flakes)
3 tsp. low sodium soy sauce
2 large egg whites
1 c. Panko (Japanese bread crumbs. You can find them in the Asian section of your grocery store)
6 (4 ounce) boneless pork chops (we used center cut, about 2 inch thick(
1 tsp. oil

Dressing-
2 Tbsp. chopped green onion
2 Tbsp. chopped flat leaf parsley
4 Tbsp. fat-free sour cream (I used plain Greek yogurt because I had it)
2 Tbsp. skim milk
2 Tbsp. light mayo
2 tsp. cider vinegar
1/2 tsp. garlic powder

Process:
-Preheat oven to 450 degrees
-Combine first 6 ingredients in shallow bowl. Combine egg whites and soy sauce in a separate bowl, whisking to combine. Place Panko in a third shallow dish.
Dredge pork in flour mixture; dip in egg mixture. Dredge in Panko, pressing to adhere breadcrumbs to pork.
-Heat oil in skillet over medium-high heat. Add pork to pan, cooking about a minute on each side, till slightly golden.
-Place pork on cookie sheet, sprayed with cooking spray. Bake at 450 degrees for about 8 minutes. Pull pan out and flip pork over. Continue cooking until done (about 8-10 minutes).
-Combine dressing ingredients in glass bowl and stir. Pour mixture over pork chops and serve!


Turkey Burgers, Take Two


There's nothing better, in my humble cook's opinion, than grilling out during the summer months. I am by no means adept at handling said grill. That is the Mr's area of expertise. BUT! I do get involved with the preparations before the food hits the sizzle.
We eat quite a bit of turkey in the Mr./Mrs. household. I like the fact that it tastes lighter and we tend to buy the leanest cuts available to make our meals somewhat healthier. But I will admit that turkey can be B-O-R-I-N-G! So I started searching for ways to jazz up our old standby. This recipe works with fresh or dried herbs and spices and is sure to add some zest to your summer gathering.
Cheers!
MM

Spicy Turkey Burgers (adapted from allrecipes)
Ingredients:
2 pounds lean ground turkey
2 cloves fresh garlic, minced
2 green chile peppers, diced (I used canned green chiles)
1 small red onion, finely diced
1 bunch cilantro, chopped (just grab a good handful and go to town)
1/4 cup low sodium soy sauce
3 Tbsp. Paprika
1 Tbsp. ground dry mustard
1 Tbsp. ground cumin
salt and pepper to your tastes

Process:
Mr. likes to spread the ground turkey out on a cutting board (strictly used for raw meat!) and evenly distribute the remaining ingredients before mixing by hand. Pack combined mixture into patties, making sure to press tightly so they stay formed on the grill. Add to the fire and cook to desired temperature (about 7 minutes per side).

Cinco De Mayo Spread

Cinco De mayo is one of my favorite times to host a fun get together, simply because I love Mexican food and any chance to make guacamole is good in my book! Well, the 5th of May fell on a Wednesday this year. As you can tell by the title of this blog, not so conducive to our cooking strategy. So we decided to celebrate early, just the Mr. and me, with our own little fiesta.
On the menu:
-Annie's Island Chicken (ok, not so Mexican, but we wanted to use it for various recipes!)
-Black Bean and Corn salad
-Guacamole (yes!!!)
-Warm corn tortillas and all the fixings
-Lots of cerveza!

From this menu we were able to eat well throughout the week and use the chicken for tacos, fajitas and chicken salads.
Salud!
MM

Annie's island Chicken (from Annie's Eats)
Ingredients:
½ cup vegetable oil
3 tbsp. lemon juice
1½ tbsp. soy sauce
1 clove garlic, minced or pressed
½ tsp. dried oregano
¼ tsp. salt
Freshly ground black pepper
2-4 chicken breasts

Process:
Combine all ingredients except chicken in a mixing bowl or large airtight plastic bag. Whisk or shake well until the marinade is well mixed. Add the chicken breasts to the bowl or plastic bag so that they are covered by the marinade. Press out all the excess air and seal the bag tightly. Refrigerate and marinate up to 10 hours.

When ready to cook the chicken, preheat the oven to 350° F. Place the chicken breasts in a baking dish and pour the excess marinade over them. Bake in the oven until cooked through and the internal temperature reaches 165° F, about 45 minutes (exact baking time will depend on the size of your chicken pieces.) Remove from the oven and let rest for 5 minutes before serving. (We shredded several of ours to use for tacos that night).

The Johnson's Famous Guacamole (adapted from Mum Sue's recipe)

Ingredients:

1/4 red onion, minced
2 cloves garlic, minced
1/2 teaspoon salt
2- 4 ripe Hass avocados (depends on how much Guac you want)
1 lime, juiced
2 to 3 tablespoons roughly chopped fresh cilantro leaves
1 ripe plum tomato, cored and diced
1/4 to 1/2 jalapeno (with seeds), minced

A dash or 2 of Worcestershire

Process:

There's really not much to it. Mass all the ingredients in a bowl until well blended. Taste and adjust seasoning. I like to make my guac a few hours ahead and let it sit in the fridge (well covered with saran wrap) so the flavors blend.


Black Bean and Corn salad
Ingredients:
1/2 red onion, diced
1 Hass avocado, diced
2 roma tomatoes, diced
1 16 oz. can black beans, drained and rinsed
1 ear of corn, boiled and kernels cut from cob
1 small handful of cilantro, chopped
1 lime, zested and juiced
1/2 tsp cumin
2 Tbsp EVOO (Extra Virgin Olive Oil)

Process:
Combine first 5 ingredients in a medium glass bowl, tossing well. Combine lime zest and juice, 2 tbsp EVOO and cumin in a small bowl and whisk well. Pour liquid mixture over salad, tossing to combine. Sprinkle cilantro over top. Enjoy!


The Complete Feast!


Friday, April 30, 2010

Spiced Up Pork Loin


I have tried to become a more savvy shopper when it comes to my weekly grocery store adventure. I used to check out recipes, find something that sounded good and make my shopping list based on my taste buds.
There's nothing wrong with that approach per say... but the Mr. and I love to watch our budget whenever and wherever we can. So I have become a huge fan of the store circular! You know, that fabulous ad that arrives in the mailbox mid-week? It showcases all the latest deals and specials happening at a store near you. Now, I check out what's on sale, then search my saved recipes to find a good match!
The Mr. bought me Cooking Light's Best recipes for 2010 and I have had several recipes marked for the past month. Spice Rubbed Pork Tenderloin sounded fab once I discovered pork loin was the special of the week at Kroger.
This recipe is packed full of flavor, but the cumin definitely dominates, so if you are not big on that spice this may not be the dish for you. Of course, you can always sub in another flavor.
I omitted the sugar (per the Mr.'s request) and instead added a little extra cinnamon. We also quadrupled the recipe and had to cook our loin considerably longer (about 70 minutes total) since I bought an almost 4 pounder. Whoops! More for leftovers...

Cheers!
MM

Spice Rubbed Pork Loin (adapted from Cooking Light best of 2010):
Ingredients-
- 1 tsp. sugar (I omited)
- 1 tsp. garlic powder
- 3/4 tsp. salt
- 1/2 tsp. allspice
- 1/2 tsp. ground cumin
- 1/4 tsp. dried thyme
- 1/4 tsp. ground nutmeg
- 1/4 tsp. cinnamon
- 1/8 tsp. ground red pepper
- 1 (1 lb.) pork tenderloin, trimmed (I used a 3.6 lb. pork loin)
- 2 tsp. EVOO

Process-
-Preheat oven to 350 degrees.
-Combine first 9 ingredients.Rub mixture over both sides of pork and let stand 20 minutes.
- Heat EVOO in large skillet over medium-high heat and brown pork, about 4 minutes on each side.
-Bake at 350 degrees for 15 minutes, turning pork over after 7 minutes, until thermometer reads 155 degrees.
-Let stand for 10 minutes before slicing.

Tuesday, April 27, 2010

Spring Quiche with Asparagus


First off, I must apologize for the incredibly poor quality of this picture. It does NOT do this wonderful breakfast justice! My family was just so eager to chow down, I forgot to get a good rendering of the finished masterpiece!
My dad and step mom came to visit recently for a nice weekend visit. The Mr. and I bought my dad a beer brewing session for Christmas and we finally made it into the brewery's appointment book! Obviously, we knew there was a day of drinking ahead of us, so I wanted to get a decent ballast into our stomachs for the long haul.
I had purchased some beautiful asparagus earlier in the week, along with my favorite veggie, portabella mushrooms! I added a red bell pepper, some shallots, and fresh rosemary and decided a quiche was the way to go!
I found this recipe from the food blog Sing For Your Supper. I made a few changes just using what I had on hand. I would say this was a success... considering I had to snatch this one and only picture before my dad and Mr. devoured the last pieces.

Cheers!
MM

Spring Vegetable Quiche (adapted from Sing For Your Supper)
Ingredients:
- 1 9 inch pie crust (I was feeling lazy and didn't want to make my own. Pillsbury filled in just fine)
- 4 large eggs
- 6-7 Tbsp. liquid egg whites
- 3/4 C. low-fat milk
- 1 bunch fresh asparagus
- 1/2 medium red bell pepper, julienned
- 8 baby bella mushrooms, sliced
- 3 shallots, sliced
- 1/4 C. fresh rosemary, minced
- 1/2 C. Asiago, shredded
- 1/2 tsp. salt
- fresh ground pepper
- 1 tsp. dried oregano
- pinch of garlic powder

Process:
- Preheat over to 400 degrees
-Place pie crust plate on cookie sheet (in case of spills)
- In a medium saute pan, cook shallots, diced pepper and mushrooms until softened. Set aside to cool slightly.
- In a glass bowl, whisk together eggs, egg whites, milk and spices.
- Spoon vegetable mixture evenly in pie plate.
- Sprinkle cheese evenly over vegetables.
- Pour egg mixture into pie plate, making sure to leave about 1/4 inch of pie crust exposed at top.
- Bake quiche in oven until eggs are set, between 50- 60 minutes (I like my eggs on the firmer side so I increased the cooking time to about 75 minutes).
- Let quiche set for about 5 minutes before serving!

Sour Cream Biscuits with Rosemary and Cheese


I am a huge fan of biscuits. They just seem to embody everything that is good and tasty about comfort food: a succulent, pipping hot, right-from-the-oven biscuit is a perfect compliment to most meals. So when I was home visiting my family in Arizona, I thought I would whip up a batch for our belated Easter celebration.

I found the original recipe for these drop biscuits when I was enjoying a lazy day of browsing through myrecipes.com. I made a few adaptations to suit our springtime meal of ham and potato salad. I hope these biscuits bring you as much joy in your tummies as they did to my family.

Cheers!
MM

Sour Cream, Rosemary, and Asiago Drop Biscuits (adapted from Cooking Light)
Ingredients:
- 2 C. all-purpose flour (I used half whole wheat flour the first time I made these and they turned out just fine)
- 1 Tbsp. Sugar
- 2 tsp. baking powder
- 1 tsp. salt
- 1/4 tsp. baking soda
- 3 Tbsp. chilled butter, cut into small pieces
- 1 C. shredded Asiago cheese, or Italian cheese blend (I used a mix of Parm, Asiago and Romano)
- 1/2 C. fresh Rosemary, finely chopped
- 1 C. reduced fat milk
- 1/2 C. reduced fat sour cream

Process:
-Preheat oven to 450°.
-Lightly spoon flour into dry measuring cups; level with a knife.
-Combine flour, sugar, baking powder, salt, and baking soda in a large bowl, stirring with a whisk.
-Cut in butter with a pastry blender or 2 knives until mixture resembles coarse meal.
-Add cheese and onions; toss well.
-Add buttermilk and sour cream; stir just until moist.
-Drop dough by 1/4 cupfuls onto a baking sheet coated with cooking spray.
-Bake at 450° for 15 minutes or until edges are brown.
-Remove biscuits from pan; cool on wire racks.

Nutritional Information (1 biscuit)
Calories: 146 (29% from fat)
Fat: 4.7g (sat 2.9g,mono 0.8g,poly 0.2g)
Protein: 5.2g
Carbohydrate: 20.1g
Cholesterol: 14mg
Sodium: 406mg

Ban Boring Chicken with Balsamic!


I lived in a sorority house for 3 years and the most common dinner item on the menu was chicken: baked chicken, chicken strips, chicken with mystery sauce... basically anything boring was fair game. Needless to say, when I graduated and moved out on my own I rarely made chicken for myself. Until now! I understand the nutritional value or chicken as a lean protein, but just because I want to eat healthy doesn't mean I can't have fun, right?

I don't have an exact recipe for this Balsamic Chicken. I found a few guide recipes through the Whats Cooking message board on The Nest. This recipe turned out moist, tender and full of flavor. Enjoy!

Cheers!
MM


Ingredients:
-4 boneless, skinless chicken breasts
-2 cloves garlic, minced
-1/2 C. baby portabella mushrooms, quartered
-1/2 red onion, diced
-2- 3 roma tomatoes, diced
-1 1/2 C. Balsamic Vinegar

The Process:
-Heat 1 Tbsp. EVOO in large saute pan over medium heat. Add garlic and cook till fragrant (about 30 seconds) stirring constantly. Set garlic aside.
-Add onion and mushroom to pan and cook until softened, about 6 minutes. Set veggies aside, with garlic.
-Add 1/2 C. Balsamic to pan and bring to rolling boil over medium-high heat.
-Add chicken breasts to pan and simmer for about 5 minutes. Turn chicken over and continue cooking an additional 3-4 minutes.
-Add additional 1 C. Balsamic Vinegar, garlic, mushrooms, tomatoes, and onion.
-Let chicken simmer with veggie mixture until cooked through. Place chicken on a plate and keep warm.
-Reduce Balsamic and veggie mixture until thickened and equal to 1/2 C. liquid.
-Plate chicken, cover with 3 Tbsp. sauce mixture. We topped our chicken with 2 Tbsp. creamy goat cheese. So delicious!

Thursday, March 11, 2010

Stuffed! Literally.

The Mr. and I have a busy week and a half before we head on vacation (small happy dance inserted here). So, on Sunday we decided to make a few meals that will see us through until our departure.
One of my favorite go-to's is baked pasta. But I hate feeling like I am chowing down on so many carbs just days before slipping into a bikini!
I found this recipe from one of my favorite chefs, Giada De Laurentis. If she can eat pasta all the time and stay teeny tiny, there is hope for the rest of us! I made a few adaptations to make this mixture even more healthy.


Turkey and Artichoke Stuffed Shells (adapted from Everyday Italian):

Ingredients-

-1 12oz. Box Jumbo Pasta Shells

-1/2 Yellow Onion, chopped

-3 Cloves Garlic, chopped

-1 lb. Ground Turkey meat

-1 package Frozen Artichokes, coarsely chopped (I used canned, medium artichokes)

-1 15oz. container Ricotta cheese (I used low fat Cottage cheese)

-3/4 c. grated Parmesan (I used low fat shredded Italian cheese blend)

-2 Eggs, lightly beaten

-1/4 c. Fresh Basil, chopped

-2 Tbsp. Fresh Italian Parsley, chopped (I omitted)

Process-

Bring large pot of water to a boil. Add pasta and cook until slightly tender, but still very firm (about 5 minutes). Drain pasta and set aside to cool.

In a large skillet, heat 3 tablespoons of olive oil over medium-high heat. Add onion and garlic, cook for about 3 minutes, occasionally stirring. Add the ground turkey to the skillet, and season with salt and pepper. Cook until meat is slightly golden and cooked through. Add artichokes, stir to incorporate. Remove from heat and let mixture cool.

In a large bowl, combine turkey mixture with Ricotta (or Cottage cheese), Parmesan, eggs, basil, parsley and salt and pepper. Stir to combine all ingredients.

Cover the bottom of a 9 x 13 baking dish with your favorite pasta sauce. I used Giada's Arrabbiata sauce, minus the pancetta. Take a shell in palm of your hand, spoon turkey mixture inside of shell (will equal about 2 Tbsp.). Place stuffed shell along edge of baking dish, stuffing side up. Continue stuffing until baking dish is full. We were able to fill two baking dishes. Drizzle remaining pasta sauce over shells and top with shredded Italian cheese.

Bake in 400 degree oven until shells are warmed through and cheese is melted, about 20-25 minutes. Enjoy!

Cheers! MM

Mad for Muffins


I love the ease of grabbing something quick for breakfast in the mornings. Something portable, something you can eat on the go and not have to thin too much about it.

That is where my love of muffins fits in to the equation. Since the Mr. and I are always looking for ways to eat healthier, I wanted to make up a batch using some brand new whole wheat flour my parents bought in the Amish country.

I found three different variations of Apple Spice muffins... a little from this one, a pinch from that one, and we have....

Spiced Applesauce Muffins:

Ingredients-
-3/4 c. Whole Wheat flour
-3/4 c. All Purpose flour
1 1/2 tsp. Baking Powder
-1 tsp. Cinnamon
-1/2 tsp. Nutmeg
-1/4 tsp. Allspice
-Pinch of salt
-3/4 c. Packed Brown sugar
-2 eggs
-4 Tbsp. butter, melted (I used Country Crock sticks)
-1/3 c. Vanilla yogurt
-1 c. Cinnamon applesauce (or whatever kind you have on hand)

Process-
-Preheat oven to 400 degrees.
-Prepare muffin tin with cooking spray or cupcake liners.
-Mix together dry ingredients, except sugar, in medium bowl.
-Whisk eggs, brown sugar and yogurt in separate bowl.
-Slowly stir in melted butter (cooled) until mixture is creamy, then add applesauce.
-Slowly add dry ingredient mixture to wet. Fold until just moistened.
-pour batter into muffin tins, about 2/3 full.

Topping-
-3 Tbsp. Brown sugar
-1 tsp. Cinnamon

-Mix together and sprinkle topping over uncooked muffins.
-Bake for 20-22 minutes. Tops of muffins should be golden ans toothpick inserted to top should come out clean.
-Transfer to wire rack and allow to cool completely.

Cheers!
MM

Monday, March 8, 2010

Catching Up... Fondue, Valentines and the Furbaby!


So, once again I broke my promise and did not upkeep this little blog... my bad. It's been a busy few weeks and the cold weather makes me want to hibernate whenever possible. Now that I have seen the sun and the temperatures cleared the 50 degree mark, it is time to catch you all up!
The most amazing fondue... ever.
The Mr. and I received a fab fondue set as a wedding present. Almost a year ago. And never used it. I know, I know... why did we even register for it. Well, now I know! This recipe. We wanted to do something different and special for our first married valentine's Day. I scoured the Internet for a decent broth fondue recipe and stumbled upon RecipeZaar. The Mr. picked up some scallops and shrimp from our favorite seafood shop and I grabbed a New York Strip, some portabella mushrooms and a beautiful yellow pepper.
The result? Fabulousness!


Ingredients:
-2 Bay Leaves
-2 Garlic Cloves, minced
-2 cans, Swansons Beef Broth
-1/2 bottle White Wine (I used a bit more... like 3/4 the bottle)
-2 c. Water
-1 packet French Onion Soup Mix
-1/2 bottle Cocktail Sauce

Process:
-Turn fondue pot on medium heat.
-Saute the garlic in 1 Tbsp. Olive Oil until fragrant (about 1 minute)
-Add remaining ingredients and turn fondue pot on high.
-Bring mixture to a rolling boil then reduce heat. Let broth simmer about 1 hour.
-When you are ready to eat, return heat to high and enjoy!

**Each fondue manufacturer provides their own cooking guidelines. Make sure you follow the correct temperature and cooking time as stated to avoid eating undercooked food.

I also made the Mr's favorite dessert: Red Velvet Cupcakes with Cream Cheese frosting. I searched high and low for the BEST recipe and found Bridget's Red Velvet Cake Comparison. I followed her advice and chose this recipe, originally from Apple a Day. They were very tasty; moist, beautifully red, and full of flavor. Try them for your sweetheart!


Ingredients:
-2 1/2 c. Cake Flour (you must use cake flour, not all-purpose)
-1 1/2 c. sugar
-1 tsp. Baking Soda
-1 Tbsp. Cocoa Powder
-1 tsp. Salt
-2 Eggs
-1 1/2 c. Vegetable Oil
-1 c. Buttermilk (I used 1% because the Mr. prefers it)
-2 Tbsp. Red Food Coloring (If you are creeped out by the thought of so much red dye, feel free to scale back)
-1 tsp. Vanilla Extract
-1 tsp. White Distilled Vinegar

The Process:
-Preheat oven to 350 degrees
-Prepare muffin tins with cooking spray or use silicone baking cups.
-Sift together flour, sugar, baking soda, cocoa and salt into medium bowl.
-Beat together eggs, vegetable oil, milk, food coloring, vanilla and vinegar with electric mixer.
-Add dry ingredients to wet and beat until smooth.
-Pour batter into cupcake tin or cups, 2/3 full.
-Bake about 15 minutes and then check if cupcakes are done by inserting a toothpick into the center of cake. If it comes out clean, the cakes are finished... if not, bake additional 2 minutes, then try toothpick again.
-Let cupcakes cool 5 minutes, then invert onto wire baking rack. Let cupcakes cool completely.

For the frosting, I used this recipe and her method of cutting a cone out of the top of the cupcakes and piping in the icing. They were so tasty I forgot to take a picture! So i will leave you with a pic of the Mr. and our furbaby, Sophie. Guess it was a good meal!


Tuesday, February 9, 2010

Cooking for the Week Ahead


As you can tell by the title of this blog, the Mr. and I see little of one another during the week with our opposite schedules. So, we love to spend the weekends not only spending time together, but also making things easier on ourselves for the week to come. We typically cook 2 or 3 meals to eat off from during the work week. The Crock Pot always comes in handy to cut down on the time we spend standing over the stove.

I saved this recipe from Cooking Light many months ago... but never got around to trying it out. This past weekend, while feeling the Asian Persuasion, I decided to pull it out and mix it up!
Not only does the Char Siu pork smell amazing while it's cooking, it comes out of the Crock Pot perfectly tender and easy to shred. We have used this meat in wraps, on top of brown rice and egg noodles. I think it would also be tasty in some Asian tacos!


Char Siu Pork (from Cooking Light magazine)
Ingredients:
1/4 cup low-sodium soy sauce
1/4 cup hoisin sauce
3 tablespoons ketchup
3 tablespoons honey
2 teaspoons bottled minced garlic
2 teaspoons grated peeled fresh ginger
1 teaspoon dark sesame oil
1/2 teaspoon five-spice powder
2 pounds boneless Boston butt pork roast, trimmed
1/2 cup fat-free, less-sodium chicken broth

Instructions:
Combine first 8 ingredients in a small bowl, stirring well with a whisk. Place in a large zip-top plastic bag. Add pork to bag; seal. Marinate in refrigerator at least 2 hours, turning occasionally.
Place pork and marinade in an electric slow cooker. Cover and cook on low for 8 hours.
Remove pork from slow cooker using a slotted spoon; place on a cutting board or work surface. Cover with aluminum foil; keep warm.
Add broth to sauce in slow cooker. Cover and cook on low for 30 minutes or until sauce thickens. Shred pork with 2 forks; serve with sauce.
Nutrition:
Calories: 227 (38% from fat)
Fat: 9.5g (sat 3.1g,mono 3.9g,poly 1.1g)
Protein: 21.6g
Carbohydrate: 12.7g
Fiber: 0.4g
Cholesterol: 73mg
Sodium: 561mg

Why Hello Ginger, Take Two!

So, you may remember that I first discovered the power of this little root last weekend when we made Ginger Scallops. Well the Mr. was such a fan, he wanted to make another recipe involving ginger and scallops, so off to my trusty recipe collection I went to search for an alternative.
I found this recipe, also from Sam the Cooking Guy, and I liked that it offered a little twist from the simple ginger, scallions and butter recipe of last week.

These bad boys turned a beautiful caramel color once seared and the extra marinade is added to the pan to create a tangy sauce to pour over the scallops. We paired this meal with some simple stir fry noodles and a salad with ginger vinaigrette.
Another fantastic night with my girl, Ginger!

Asiany Scallops (from Sam the Cooking guy)

Ingredients:
1/2 cup soy sauce
Juice of 2 limes
Juice of 1 lemon
2 tablespoons sugar
1 teaspoon fresh ginger, finely chopped
1 teaspoon sesame oil
1 lb large sea scallops
peanut oil (I used more sesame oil since we didn't have peanut)

Directions:
-Place all ingredients except scallops in a glass or ceramic shallow bowl.
-Mix well and add scallops.
-Marinate 5 minutes each side at room temperature. If you marinate scallops too long, they'll get mushy. (I only marinated the scallops for about 5 minutes TOTAL, 2 minutes per side)
-Transfer scallops to a plate and reserve marinade.
-Heat 1/2 teaspoon oil in a large saute pan over high heat until hot and almost smoking.
-Add scallops (cook in batches if necessary to keep from being too crowded) and saute quickly until seared brown and just cooked through - about 2 minutes a side.
-Remove from pan.
-Add marinade to pan and boil until reduced to about 1/3 cup, about 2 minutes.
-Drizzle scallops with sauce.

Snow= Soup!


The Mr. and I have been enjoying the cold weather for only one reason... homemade soups! I love making my own MMM goodness instead of eating the preservative and sodium filled alternatives from a can.

I found this recipe by accident on AOL foods. The Mr. and I LOVE black beans and roasted red peppers, so it sounded like a great fit for us.


I made a few adaptations from the original recipe, but I think it turned out wonderfully. Savory, full of nutrients and protein, perfect for the 6 inches of snow falling outside our window right now! When the soup has cooled, we like to separate it into individual containers so it is easy to grab on the go for work or dinner.


Bean, Pasta and Roasted Pepper Soup (from AOL foods)
Ingredients:
1 tbsp. olive oil
2 large carrots , diced
2 stalks celery , diced
1 large onion , chopped
1 tbsp. chopped fresh parsley
3 cloves garlic , minced
1 can (49 1/2 oz.) Swanson® Chicken Broth (I used 8 cups, or 2 boxes of low sodium Chicken stock)
1 can (about 15 oz.) black beans , rinsed and drained
1 can (14 1/2 oz.) diced tomatoes
1/2 cup uncooked ditalini pasta (I omitted this... didn't want the extra carbs)
1/2 cup roasted sweet red pepper strips
1 tbsp. red wine vinegar

***I added 1/2 lb. of sweet Italian turkey sausage

Instructions:
HEAT oil in sauce pot. Add carrots, celery, onion, parsley and garlic and cook until tender. Add broth, beans, tomatoes and pasta. Heat to a boil. Cover and cook 15 min. or until pasta is done.
ADD peppers and vinegar. Heat through.

Monday, February 8, 2010

Banana Bread... Without the Guilt!


I looove baked goods. I mean, let's be honest... who doesn't enjoy something carbtastic right out of the oven and covered in butter? But as I enter my mid-to-late-twenties and my metabolism starts to scale back, I realize that I can no longer scarf up all the goodies I want without seeing my waistline change. Boo!
So, I have become a huge fan of Cooking Light recipes, from Cooking light Magazine. They take some of your favorite stand-bys and figure out ingredient swaps to cut down on excess fat, cholesterol, carbs, etc. It's a win-win for you and your body!
I made this Banana Bread recipe last weekend for the Mr. It was wonderful. Moist, dense, full of banana flavor and a hint of spice. Try it and compare with your full fate version... bet you can't tell the difference.

Classic Banana Bread (from cooking Light)
Ingredients:
2 cups all-purpose flour
3/4 teaspoon baking soda
1/2 teaspoon salt
1 cup sugar
1/4 cup butter, softened
2 large eggs
1 1/2 cups mashed ripe banana (about 3 bananas)
1/3 cup plain low-fat yogurt (I used applesauce and it turned out great)
1 teaspoon vanilla extract
Cooking spray
Preparation:
-Preheat oven to 350°.
-Lightly spoon flour into dry measuring cups; level with a knife.
-Combine the flour, baking soda, and salt, stirring with a whisk.
-Place sugar and butter in a large bowl, and beat with a mixer at medium speed until well blended (about 1 minute).
-Add the eggs, 1 at a time, beating well after each addition. Add banana, yogurt, and vanilla; beat until blended.
-Add flour mixture; beat at low speed just until moist.
-Spoon batter into an 8 1/2 x 4 1/2-inch loaf pan coated with cooking spray.
-Bake at 350° for 1 hour or until a wooden pick inserted in center comes out clean. Cool 10 minutes in pan on a wire rack; remove from pan. Cool completely on wire rack.
Nutritional Information:
Calories: 187 (21% from fat)
Fat: 4.3g (sat 2.4g,mono 1.2g,poly 0.3g)
Protein: 3.3g
Carbohydrate: 34.4g
Fiber: 1.1g
Cholesterol: 40mg
Sodium: 198mg

Tuesday, February 2, 2010

A Crock Pot Catastrophe


Sigh. So early this fall I informed you of my shiny new tool, the hinged lid Rival Crock Pot... which I was so looking forward to using with regular frequency. I am here to tell you today that Crock Pot is no longer with us. Yep, after a short life span of maybe 6 dinners, the Crock Pot cracked under pressure. Literally!

I went to stir our fancy schmancy dinner of Salsa Chicken and CRACK! The awesome hinged lid broke into a hundred pieces... falling IN to my Salsa Chicken. WTH?!?!

Luckily for Macy's, I was able to return this sorry excuse for a slow cooker and received a full refund.

We now have a new member in the family. A slightly less glamorous, but undoubtedly more reliable 6 qt. stainless Crock pot... minus hinged lid.
Life as we know it in the M house is back on track.
Cheers!
MM

A Can of Chickpeas and a Pound of Turkey

These two ingredients had been hanging out in our kitchen for the past three weeks with no real plan for the future. Don't worry... the ground turkey was chillin' in our freezer, not collecting e-coli in the pantry!
So I went on a google hunt for recipes involving these forgotten soldiers. Voila! I found a serious contender on one of my favorite cooking blogs, Oishii Food.
Spicy Turkey and Chickpea Burgers sounded intriguing and perfect, considering the afore mentioned ingredients.
I made a few substitutions based on what we already had on hand: Cilantro, some ripe avocado and fabulous Parmesan-Garlic rolls.
The result was a wonderful mix of flavors and textures that the Mr. and I loved! This recipe is definitely one to keep in rotation.

Cheers!
MM

Spicy Turkey & Chickpea Burgers
(Adapted from Clean Eating)Serves 4 (or 2 with leftover patties)

1 (15 oz.) can chickpeas, drained and rinsed
3 green onions, white and green parts, chopped1 clove garlic, chopped
1 tsp. ground cumin
1/4 tsp. chili powder
1/4 tsp. salt
1 tsp. freshly ground black pepper
a handful of fresh parsley, chopped (We used fresh cilantro)
2 TBS. Worcestershire sauce
3/4 lb. ground turkey (We used a full pound)
2 TBS. olive oil

*In a food processor, combine the first 9 ingredients (through Worcestershire sauce). Pulse until smooth. Taste and adjust seasonings if necessary.
*Transfer chickpea mixture to a large bowl and add the ground turkey. Mix together until well combined, then form patties (we made a total of 7 patties, about 3 inches wide and 1-1/2 inch thick).
*Add some olive oil to a frying pan (a few times around the pan). Heat over medium high heat. *When hot, fry the patties, about 4-6 minutes on each side depending on thickness of patties. You may have to cook them in 2 batches.
*While patties are cooking, toast your rolls.
*Assemble burgers on rolls with the spinach leaves, red onion, mayo and/or mustard. Add tomato if in season!

**Thank you Oishii Food for this great recipe!

Why, Hello Ginger! Nice to Meet You...


I've always enjoyed the taste of fresh ginger: the tangy spice mixed with the sugary sweetness is such a sensory experience. But I have never felt confident enough to try my hand at cooking with the root.
When I found this recipe for Ginger Scallops I thought it sounded easy enough for a first timer. So, I picked up my very first nugget of fresh ginger, hit our favorite local seafood haunt and headed home to dazzle the Mr. with my new found skillz.
What a hit! We paired the scallops with a side of organic, long grain brown rice with fresh green onions and some whole green beans. To die for. The scallops literally melted in my mouth and the butter-based sauce provided just enough moisture to create a creamy rice bed. Try this recipe today!

Cheers!
MM

Ginger Scallops (from Just Cook This!)
Ingredients:
1 pound large fresh scallops, about 12
2 tablespoons butter
2 tablespoons ginger, finely chopped
2 tablespoons green onion, finely chopped
Olive oil
Kosher salt & Fresh ground pepper to taste

Mix butter, ginger and green onion in a small bowl.
Place saute pan on heat and add 1 tablespoon oil (I used sesame oil)
When almost smoking, add half of the scallops and sear on both sides until nicely browned, about 1-2 minutes a side (Our scallops were a bit large and cooked for 2-3 minutes)
When almost finished, put half the ginger butter in the pan and toss scallops until all coated.
Cook remaining scallops the same way. Serve immediately.

Ta Da!

So, after ahem months of neglecting my new venture in blogging, I decided that part of my neglect was based on a lack of subject matter. Not that I live a boring life... at least not all the time. But I doubt very much that my faithful readers really need a recounting of every weekend conversation with the Mr. and every detail of the goings on at my office. These topics do not a fun blog make.

So, I've decided to revamp this little jewel and focus on my other passion: Cooking! I have discovered a long buried urge to create masterpieces in my kitchen. Since I work nights, my only real opportunity to forage into culinary creativity is on the weekends. Hence the new name... The Weekend Chef.

I hope you will find useful recipes and the anecdotes of my own attempts to master them. I am always open to suggestions from YOU... and will take on any challenges you want to throw my way.

Cheers!
MM